Previous article: Aligned Inspection.
In an earlier article I claimed that the vacuum powered push/pull actuators for the heater air doors were working. This proved to be a bit optimistic… There was some movement from some of the actuators but the system didn’t seem to be working quite right.
I needed to do some serious diagnostics of the entire vacuum operated system. This would require running the engine for extended periods of time while connecting, disconnecting, and trying multiple components as well as trying to determine if there were any leaks. There had to be a better way…
Doing a search for vacuum pumps I discovered links to electric pumps for power brakes. These are used for things like cars with big cams which don’t produce much vacuum as well as hybrid and electric vehicles. Hmm, this could be a very useful tool for troubleshooting vacuum problems! And they aren’t that expensive – for example, this Viktor pump is less than $40. And it can be connected directly to the car battery. I learned that the vacuum pump has an unexpected feature: it shuts off when it reaches full vacuum. This proved to be a very powerful troubleshooting tool for detecting leaks. I discovered this when initially testing the pump with a vacuum gauge attached – the pump ran for a second and then stopped. I initially thought the pump was bad and then realized what was going on.
While considering different approaches to connecting to the car battery I realized that a portable power supply would be convenient. I’ve been considering getting a bench power supply for a while – these are useful for a variety of electrical projects as well as electrolytic derusting. So, add a Kungber 30V 10 amp power supply to the order.
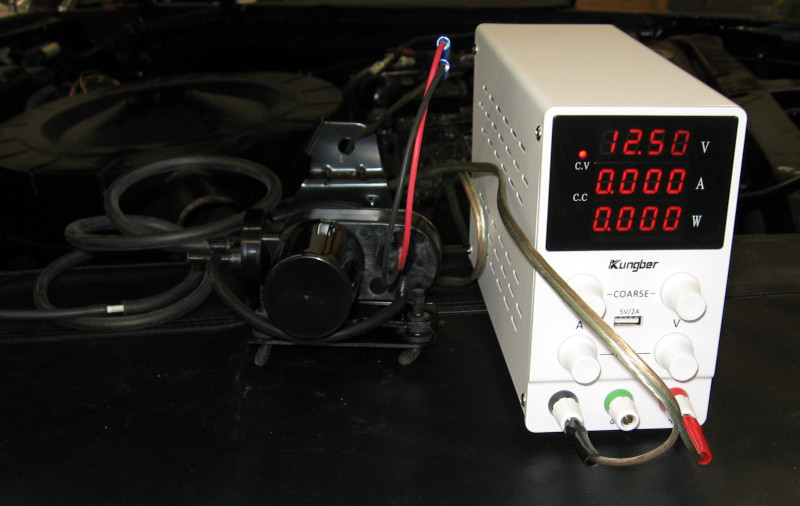
Using this setup is simple and effective: remove one of the vacuum lines from an actuator, turn on the pump, and observe the result. Then connect the vacuum pump to the other side of the actuator and verify that it works in both directions.
Possible outcomes:
- The pump runs, the actuator moves to the side the vacuum is connected to, and the pump stops when the actuator reaches its limit of travel. This is normal operation for a good actuator.
- The pump runs and then stops but the actuator doesn’t move. The actuator is bad.
- The pump runs, the actuator moves to the side the vacuum is connected to, the pump stops when the actuator reaches its limit of travel but then cycles on and off. This indicates a small vacuum leak. If the pump is cycling every 20-30 seconds, probably nothing to worry about. If it is cycling every 2-5 seconds, the actuator is a candidate for replacement.
- The pump runs continuously without stopping. There is a significant leak in the actuator and it needs to be replaced.
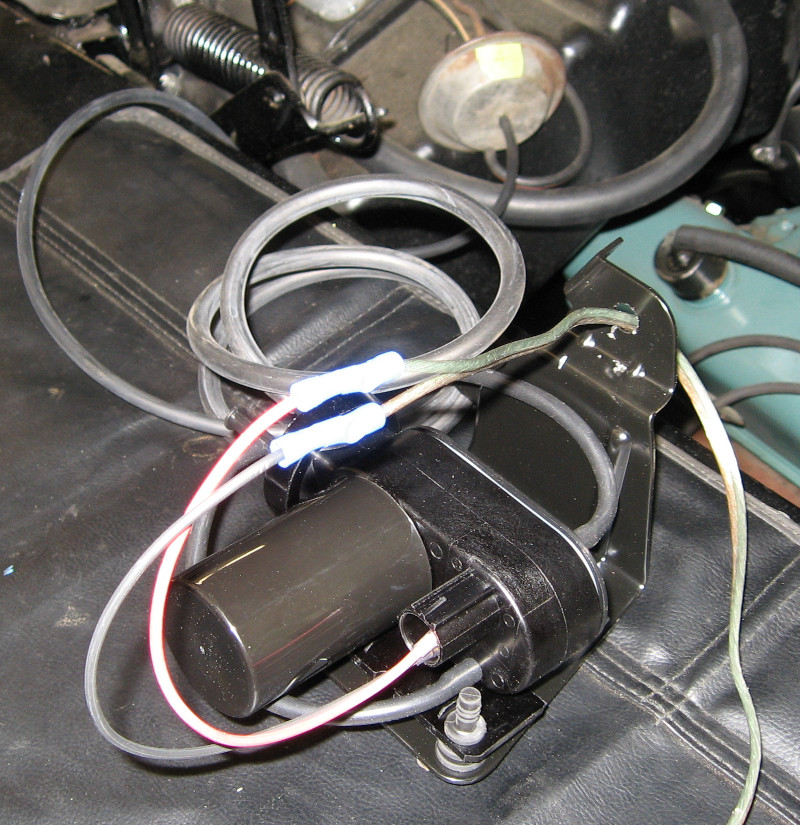
There are four vacuum actuators in the Imperial. Two of these work, one works but the pump cycles on and off, and one doesn’t move even though the pump is running continuously – this one clearly has a large leak.. In addition, one of the actuator arms won’t stay on its air door, so a retainer clip is needed.
Of course replacement actuators aren’t readily available. The next project is to figure out how to replace or repair the bad actuator and decide whether the partially leaky one also needs to be replaced.
Next: Sounds of Silence.