
A few of years ago I picked up a couple of yards of cheap indoor/outdoor carpet and (somewhat roughly) cut and fitted it to the trunk. The plan was to replace it with something better when I actually finished the trunk.
But after (semi)careful consideration, it didn’t look too bad. It was already (somewhat roughly) cut and fitted. The new side panels hide the edges of the carpet. And there were things I still needed to learn about working with carpet.
OK, change of plan – finish off the existing carpet and then decide what to do.
Something needed to be done about the rough edges of the carpet. These edges are typically bound with bias tape – a fabric tape that wraps around the edge of the carpet and is sewn in place.

There are sewing machines specifically designed to bind the edges of carpet. Just feed the carpet through the machine and you have a perfectly bound edge. Of course these machines cost several thousand dollars.
They make gadgets that fit regular sewing machines – including Juki – and fold the bias tape over the top and bottom of the carpet and hold it in place while sewing. There are commercial versions for several hundred dollars. There are also a bunch of different models in the $10-$20 price range. Several hundred dollars is too much. But I’m willing to risk $10 and some of my time on one of the cheap ones.
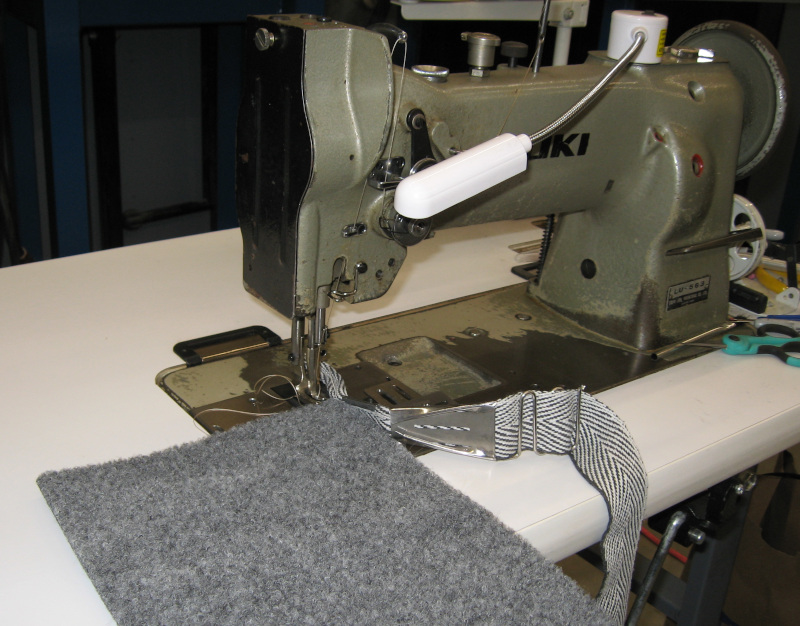
You may find this hard to believe, but the cheap tape folders suck. And I suck at using them. It is difficult to load the fabric tape into them, difficult to keep the tape properly feeding through them as you sew, and difficult to keep the tape on the carpet when sewing. I kept sewing off the edge of the carpet.
It could be that this binding attachment is intended for regular fabric – I had to open up the throat to feed this thin indoor/outdoor carpet through it. There is no way that it could be used with regular carpet.
After a fair amount of practice I got somewhat less bad. But it was still a painful experience and there was usually at least one place on each edge where I sewed off of the carpet.
After finishing edging the entire carpet for the trunk I learned a distressing truth: After all that work, I don’t really like the way it looks. A big part of this is the tape I used. Part of it is probably the cheap, thin carpet. But I just don’t like it. OK, something to keep in mind for the future!
As part of the fitting process there were several places where I needed to add additional pieces to the carpet. The initial plan was to sew these pieces in place. Which was shaping up to be a difficult and painful process. With questionable results.
Inspiration finally hit on how to do this – cut and fit cover pieces and then hold them in place with velcro. This would GREATLY simplify the job and would allow fitting after the carpet was in place. And allow adjusting and tweaking until I was happy.
Further inspiration – the sticky backed velcro tape could be used on the trunk floor to hold the carpet in place and keep it from sliding around. I’m seeing more velcro in my future!
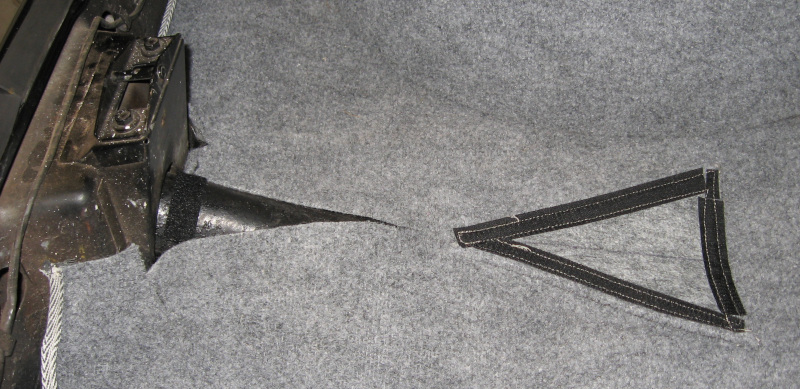
The first attempt using this approach was over the gas filler. The gas filler extends into the trunk before entering the tank. I cut the carpet to go flat on both sides of the filler; a triangular panel was needed to cover the filler. This needs to be a rather precise fit. So I have been ignoring it.
It looks like I need a triangular panel about 8″ wide and 10″ long. Since this is a removable test piece there is no need overthink it – just cut and hack one together!
Grab a chunk of carpet from the scrap pile and lay out the cutlines on the back. Hmm, need to do something about the raw edges. Don’t really want to try to deal with binding this piece. Why not just hem the edge? OK, add a hem allowance, fold it over, and sew the three edges. Looks fine!
Now to add the velcro tape. Easy to do on this filler panel, but a real job on the huge bottom piece of carpet. Just a minute – I wonder if the hook side of velcro would stick to the carpet? Yes, it does! All I need to do is sew a piece of hook velcro tape onto the bottom of the small filler pieces! This is looking better by the minute.
Since the velcro tape is adhesive backed it sticks to the carpet. Not enough for long term use, but it does a great job of holding the velcro in place for sewing. Sew the velcro to the carpet with one long seam and head over to the car.
A couple of minutes of trial fitting showcase the ease of re-positioning the panel with velcro. The end result is just what I was looking for! The hemmed edges of the carpet blend in – this looks much better than the bound edges. Running the velcro tape down the full length of each edge of the filler panel sticks it securely to the carpet. Success!
The carpet covers the full width of the trunk and extends from the rear of the trunk to the back seat. It also covers the wheel wells. Hmm, with two more carpet filler panels around the trunk hinges I think I can make this look OK…
Whip up two more triangular filler panels – with velcro! – trim and fit the carpet around the trunk hinges, apply and adjust the filler panels, then climb out of the trunk and study it.
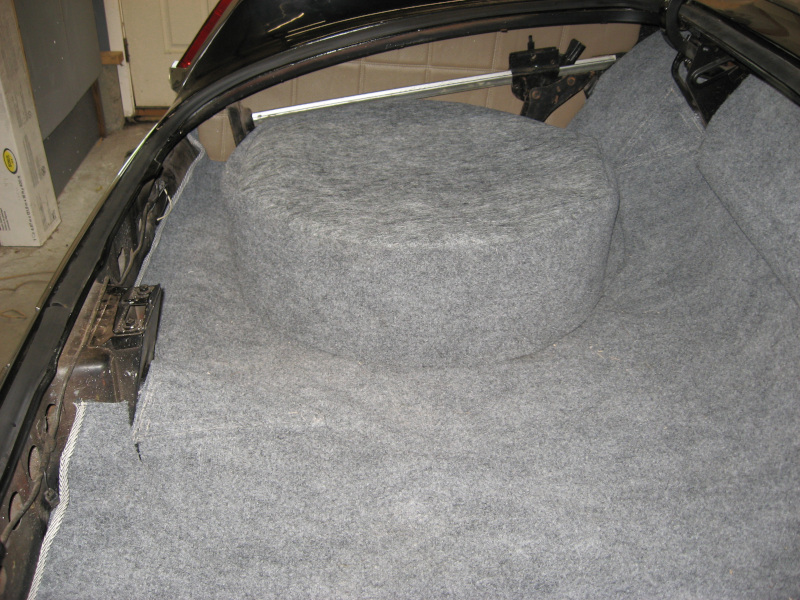
This doesn’t look too bad!
Dig out the side panels and install them. Install the jack and spare tire. Add the spare tire cover. You know, this actually looks pretty good! There are some unfinished areas visible around the back seat, but the trunk itself isn’t bad.

As I stood behind the car nodding in satisfaction something in the corner of my eye caught my attention…