
The first question is how big to make it. The only way to decide is to make different sizes and see. Fortunately this is easy: starting with the existing 4″ design simply scale it 125% to create a 5″ version and 150% to create a 6″ version then print it out.
I printed a full 5″ model and then the top half of the orb in 6″ to see what it would look like.
After handling all of them the original 4″ seemed a bit small, 6″ seemed a bit big, and 5″ was the Goldilocks size – just right.

With the size selected, time to design the new inner structure. This was largely a rehash of the last design with more LED strips.

While 3D printing is amazing it isn’t magic. A complex structure like this needs supports for overhangs, and this design has a lot of overhangs.
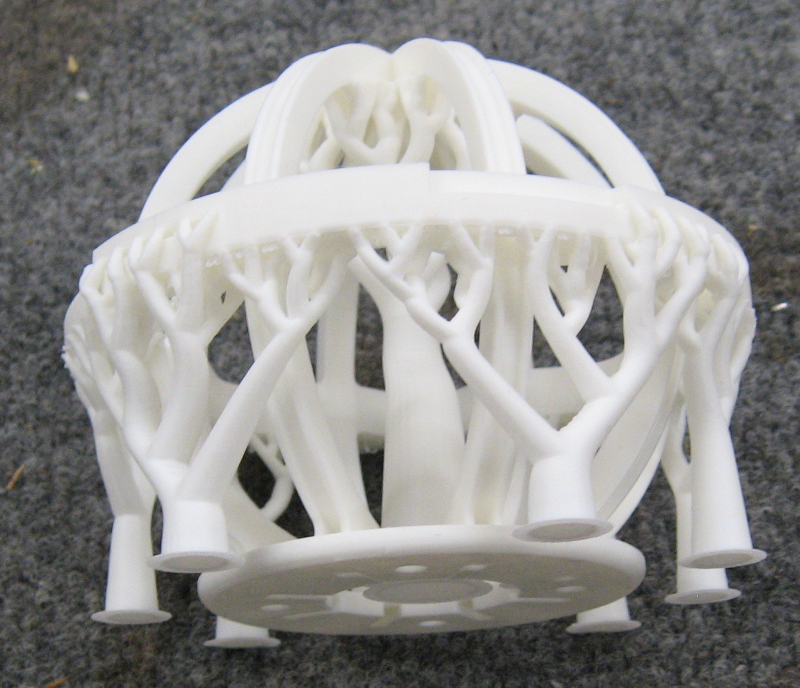
Fortunately the 3D printing software is able to generate these supports automatically. Several different types of supports are available – in this case I used tree supports. Unfortunately you have to remove the supports and clean up where they connected to the actual part. Still, a small price to pay for the power of 3D printing!
With the orb itself in reasonably good shape attention turned to the dragon paw. Hmm, what about a heavy bracelet? It would look like the dragon had been wearing a bracelet and had its arm cut off just below the bracelet. This could both look good and support the constraints of 3D printing. And we should be able to use the space inside the bracelet for something!
The best thing about this approach is that all I need to do is add a disk to the bottom of the dragon paw – the bracelet itself can be designed later and the dragon paw, bracelet, and staff body joined with screws.
At this point things got ugly. I don’t have the original 3D model for the dragon paw. All I have is the 3D printer file – an STL file containing over 180,000 triangles. Fusion can technically handle this, but it doesn’t like it. Operations that normally take a small fraction of a second take several minutes to complete.
Fortunately all I have to do is import the STL into Fusion, add a disk to the wrist of the paw, and then export it as a STEP file. With patience and a bit of luck this was finally done.

This finishes off the mechanical work for this stage. Now to bundle up all of the pieces, add the LED lighting strip and controller to the box, and send it off to my co-conspirator the Electrical Engineer to mount the LED strips and solder them together.
This is likely to be a bit of a nightmare – we are using ultra high density LED strips that are only 2.7mm wide. The mounting pads for soldering are tiny and some of them are difficult to get to. This is well beyond my skill level – hopefully it isn’t beyond his!