
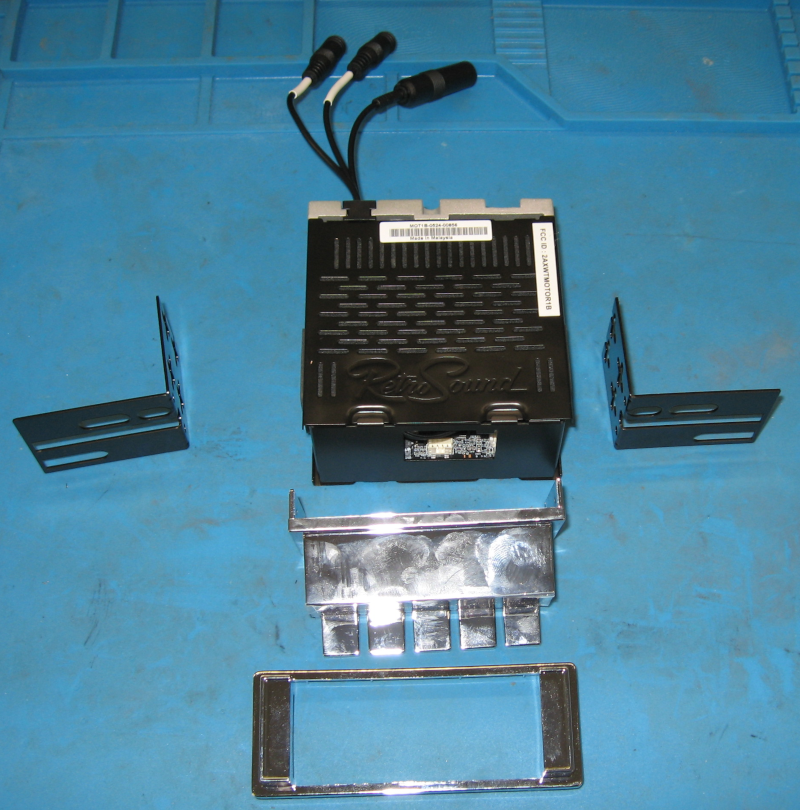
A box from RetroSound showed up. Schlep it out to the workshop. Remove the old radio. Dig out the RetroSound bezel and carefully unwrap it. Do a trial fit to see if it goes in the dash cutout.
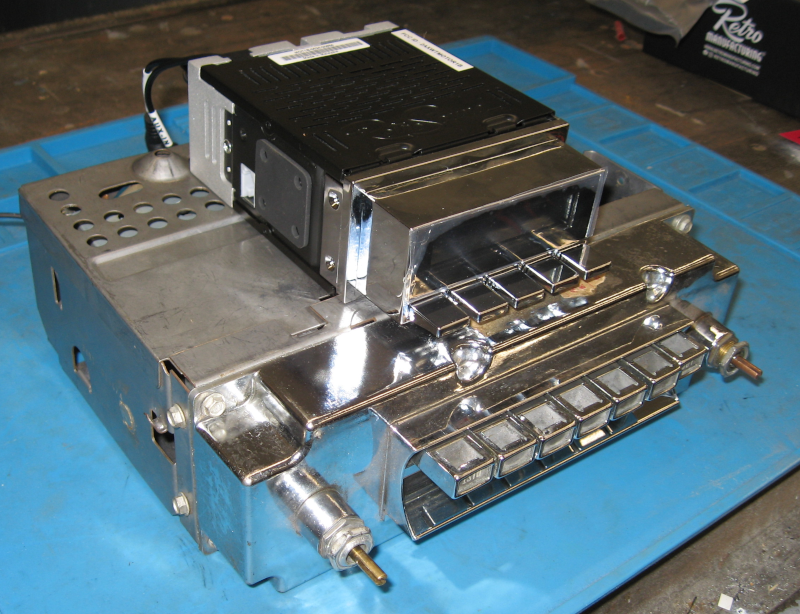
It fits! It is an absolutely perfect fit vertically – just a few thousands of an inch clearance up and down. Horizontally it is about 3″ narrower than the cutout. Further checking shows that the volume and tuning knobs will fit, thanks to the RetroSound mounting system. The new radio is about 1/4 the size of the factory radio so there is plenty of clearance around it. The new radio will fit. The only question is can I make it look good?
I have the height and width of the dash cutout. I have the height and width of the new radio bezel. Now, what about the curved dash?
If I’m lucky it will be a circular curve. Mark out half circles on cardboard at 2″, 2-1/4″, 2-1/2″, 2-3/4″ and 3″ and cut them out. Test fit them against the dash. Huh, the 2-1/2 is an almost perfect fit.
Using the trim piece that came with the bezel for inspiration, design a wider trim piece. This is still flat, but is a starting point to figure out how things fit together. Print it out and try it. It fits into the dash cutout, which is a good start. It fits the radio bezel horizontally but not vertically. Doh! – I made the cutout 1.500″ tall instead of the needed 1.540″. Dumb mistake, easily corrected.
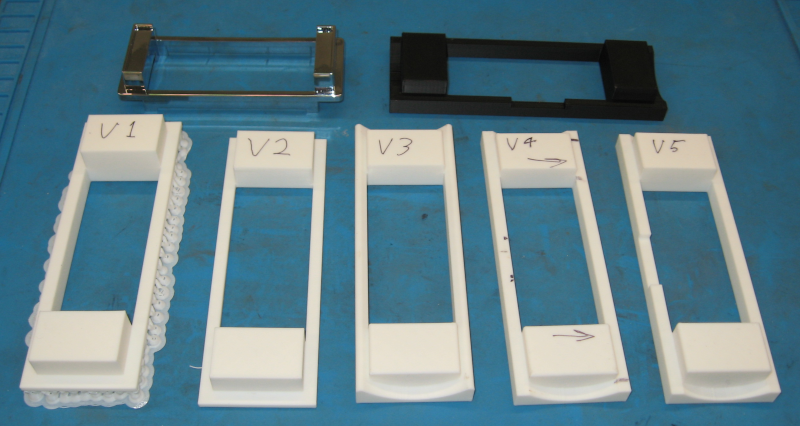
But the part wasn’t well designed for 3D printing. It included a spacer which was narrower than the trim piece. This required extensive supports to print. The slicer handles this easily, but it wastes a lot of material. For the next iteration remove the spacer, leaving a full width flat bottom flange – perfect for 3D printing. I’ll make the spacer as a separate part when I determine how thick it needs to be.
Make these adjustments and print out V2. This fits both the dash cutout and the radio bezel. Since it is flat it doesn’t fit snugly against the back of the dash.
Version 3 introduces the curved flange to fit against the back of the dash. The raised blocks on each end don’t stick out far enough, so they need to be at least 1/8″ taller. The blocks on each end don’t need to be solid. To reduce the amount of material used make pockets in the back of them.
Version 4 almost fits well – there are some tabs and doubled areas in the dash structure that stick out. Make cutouts to provide clearance around them.
Version 5 actually fit quite well. It fit the cutout in the dash, the curved flange fit snugly against the back of the dash, and it fits the radio bezel tightly.
Version 6 was a slight cleanup: fillet some visible edges so they look better and modify the material saving pockets inside the blocks to remove even more material. So far all of the test parts have been printed in PLA which is the cheapest filament available. PLA apparently doesn’t hold up well in the heat of a car interior, so switch the filament to ASA (a high strength engineering plastic) and print the hopefully “final” part.
Why didn’t I get the design right the first time? As I’ve mentioned before, engineering design is an incremental process. You create something simple as a starting point and then modify and refine it. With traditional techniques you typically create a prototype and then modify it until it works. With CAD and 3D printing you make changes in CAD and then print out a whole new part. This makes the intermediate changes more visible. In this case each part took about an hour to print out and cost less than $0.50 in materials.
It would have been hard for me to make a part which this quality of fit using traditional techniques. In my past life I probably would have used a piece of 1/4″ black foam as a filler between the radio and the dash cutout and lived with it. I like the new approach better!